
Model 2: Using a Floor Plan
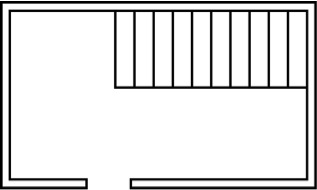
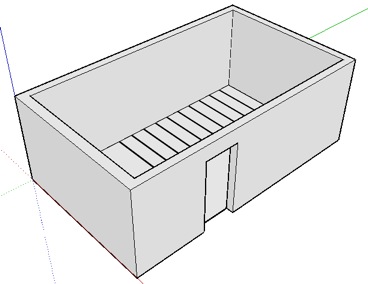
Follow the instructions below carefully, and by the end of this section, you'll have turned this:
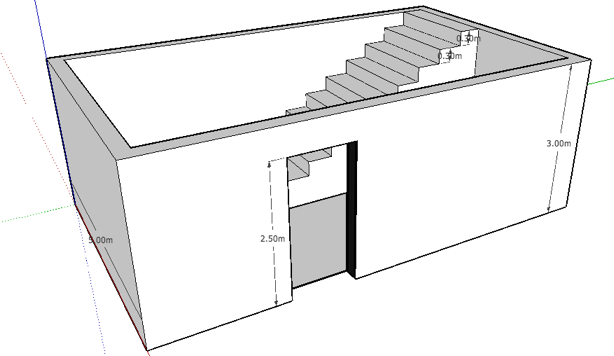
...into this:
Getting Started
You should have kept the settings from your previous assignment. This means, you should start your assignment in Metric - 2D, and have your large tool set already visible. If this isn't the case, go back to the previous assignment and follow the steps to make it happen.
Importing a Floor Plan
There are all kinds of floor plans on the internet. We're going to use a very basic one in this assignment, of a room with a staircase and a door.
Right-click on the following image, and choose 'Save Target As...' from the menu that pops up:
Make sure you save it to your
U:\\ drive!
Now, create a new document in SketchUp, and go up to the
"File" menu. Select "Import", and find the floor plan in
your U:\\ drive. Make sure to select "Import as image" from
the drop-down menu before opening (this should be selected
already).
ALSO, make sure you select 'JPEG files' in the
Files of Type... window.

You'll notice that now, a picture of the floor plan is following your mouse around the screen. Click on the origin (the middle of the screen, where the green and red lines meet), and start dragging left or right. Now, just as you've done before with Push / Pull or Move, type the following while dragging and press Enter:
5m
This should finalize the floor
plan, giving the shorter wall a dimension of 5 metres.
Lastly, right-click on the floor plan you imported, and
select "Explode" from the menu that pops up. This will make
SketchUp treat the floor plan like a regular rectangle with
a picture on it.
Watch the whole thing:
Click here to watch a video of the above
steps
Raising the Walls
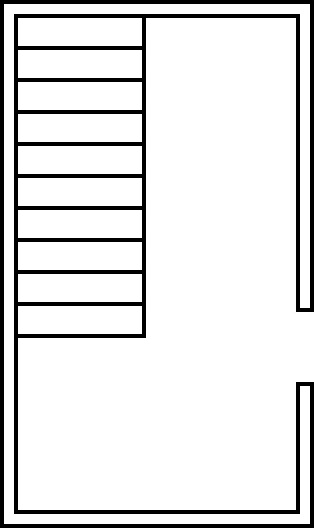
Once you have your floor plan in place, and it's treated like a normal rectangle, we can break it up into two areas - the walls, and the floor.
Now your room (including your door) should have a solid wall all around it:
Watch the whole
thing:
Click here to watch a video of the above
steps
Punching a Door Through the Wall
(Start from the floor, type 2.5m while dragging a line upwards and push Enter. Then draw a line horizontally across the width of the door, and draw another vertical line downwards.)
Now that we have a shape for our door, use Push / Pull to "punch" it through the wall.
Before we continue, you may have noticed that your model might not look exactly like the one above. If this is the case, it's just because the picture on the floor plan 'spilled over' onto the walls.
Watch the whole
thing:
Click here to watch a video of the above
steps.
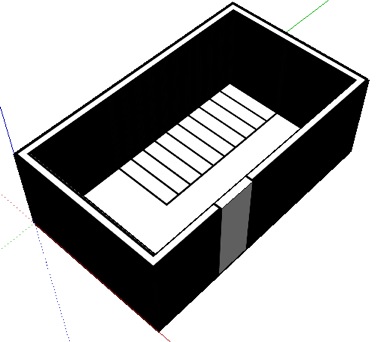
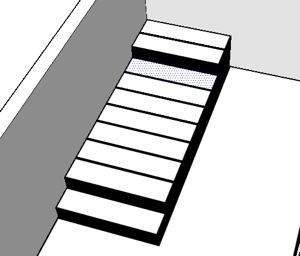
Tracing the Staircase
To make the staircase, all you need to do is trace over each line.
Watch the whole thing:
Click here to watch a video of the above
steps.
Finishing Up
To finish up your model, we need to do three more things.
![]() Use the Paint Bucket tool to give every
step in your staircase the same look, just like we did
with the walls of the floor plan.
Use the Paint Bucket tool to give every
step in your staircase the same look, just like we did
with the walls of the floor plan.
![]() Use the Eraser tool to erase any extra
lines you might have in your model. We don't want
things to look messy!
Use the Eraser tool to erase any extra
lines you might have in your model. We don't want
things to look messy!
![]() Use the Dimension tool to show me the
width of the short wall, the
height of the wall, the
height of the door, and the
height of two different steps (so I
know you were double-clicking to have them all the
same height).
Use the Dimension tool to show me the
width of the short wall, the
height of the wall, the
height of the door, and the
height of two different steps (so I
know you were double-clicking to have them all the
same height).
Watch the whole thing:
Click here to watch a video of the above
steps.
You're done!
Save your work, and then save a copy to the Assignment Drop Box by going to File, then Save As..., and navigating to the correct folder. Be sure to enter your name as the file name, so Mr. Najarian knows what belongs to whom!